My Dog's Nose is Sparkling!

Hello my SpaRklY FriEndS!
Well you know it's that time of year when you look at my dogs and they are covered in glitter!
You see, even though i have a craft room in the house and a new studio out in the back yard, I still wind up doing what my husband calls
"Illegal Crafting"
which means during the day when nobody is home- I spread my ornaments and craft stuff all over the house and in my typical ADHD fashion, work on several projects at once!


My step daughter came in one day and said
"Tobi- it looks like Christmas threw up in here!"
I am sad to say she is right!  
I'm sorry, but I really doubt that all of those lovely studios that we drool over in Somerset are really that neat when the artist is working!
I mean, if Fifi O'Neill- the GODDESS of shabby chippy Cottage decorating and styling came over, I am sure she would make it all look glamorous.  
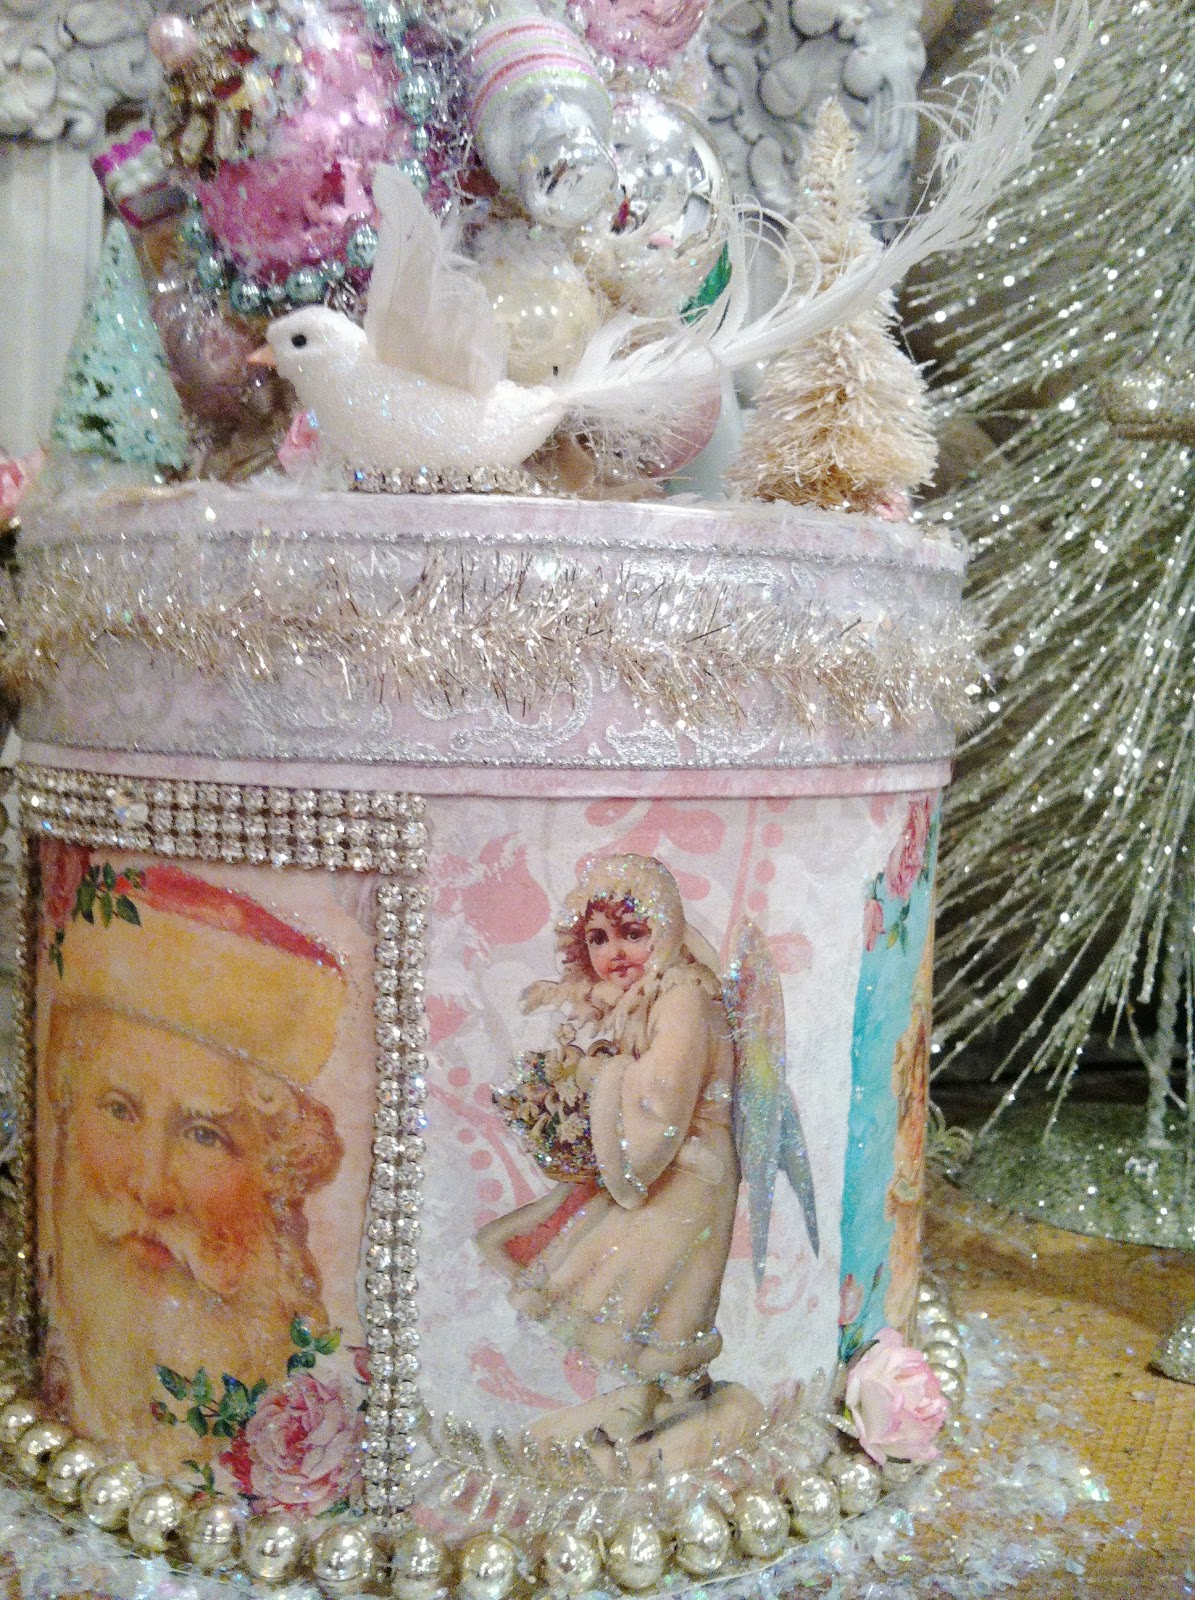
Actually, here is what my mess looks like close up- very chic- wouldn't you say??  LOL
The sweet dogs get glittered when they start nosing around while i am "sparkling"- mistakenly thinking I am making dinner!
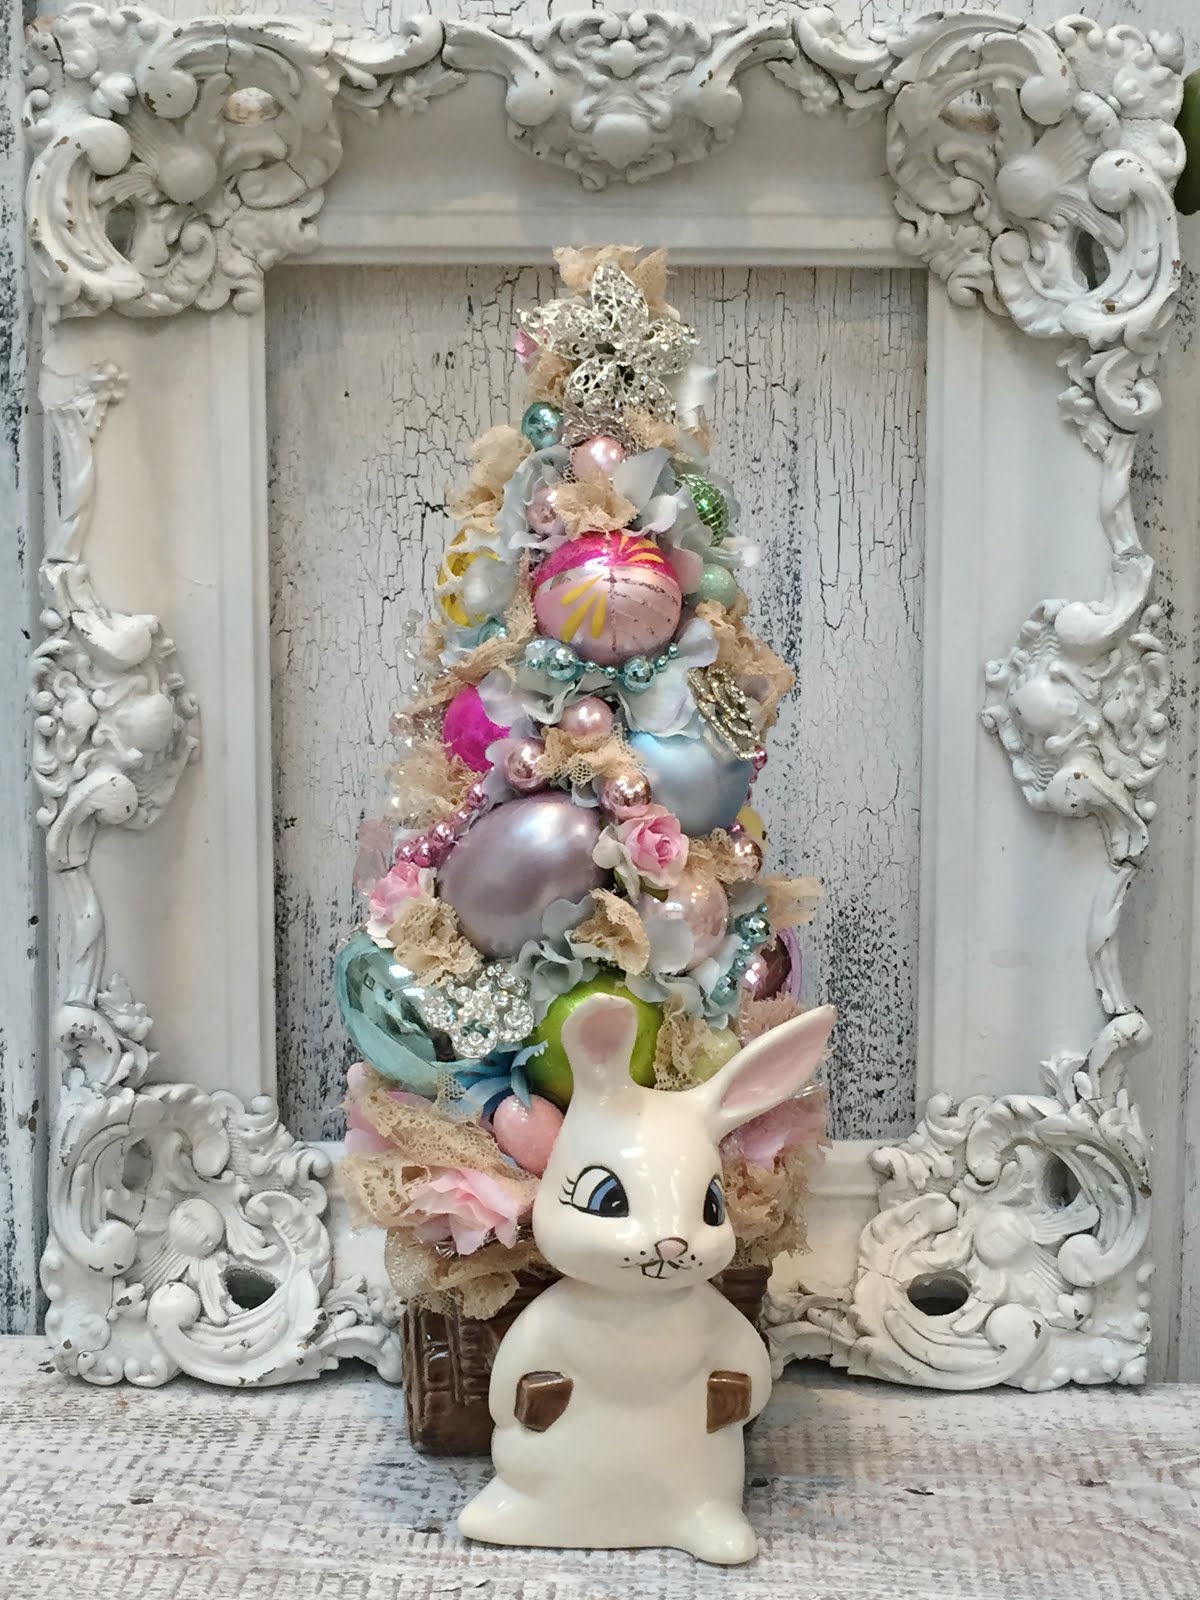
Anyhoo, here are a few things I have going on Ebay this weekend, I will be adding more there and on etsy!
Thank you Miss Beverly for featuring me and the Pixies this week- we Love PINK SATURDAY
and we LOVE YOU TOO!!
LINK TO MY EBAY


Thank you so much for visiting!!!
Sparkly Hugs,
Tobi and the Pixies! 

Santa in Pink!!!

 Hello My Sparkly Friends- 


 Happy Pink
Santa-Day to you!!  
The pixies and I have been busy in the workshop dreaming up ways to delight you for Christmas And here is one of our sparkly creations just waiting for a good home!

                                       We just LOVE this Santa

 And his beautiful angel sitting on top!

 We hope you enjoy your day!  Stop by
to see lots of Pink Inspiration!

  Click HERE to see my Pink Santa Box on Ebay!
Sparkly Hugs,
Tobi and the Pixies!

Lawn Ghosts 2012


Hello my SpaRkLy FriEnds!
Halloween is just around the corner
 and I finally put up my lawn ghosts!
Here are some new pics for your haunting pleasure.

 This year I made the ghosties more frilly and vintage.

 And I had them hold hands in a semi circle instead of a ring.

I also added a cutie patootie sitting on my bench,

And two Victorian gals wandering off to the woods.
 
I totally love these little Fairy ghosts!
Have a Spooktacular Halloween, and a
 
Ghosty Pink Saturday as well!!!
Please support Breast Cancer Awareness!
Sparkly Hugs,
Tobi and the Pixies!
Linking to Home sweet Home 
and Potpourri Friday 

Lawn Ghost Re-Post


Hello My Sparkly Friends!I have had so many requests for this tutorial I am re-posting
it for now and will post my new improved ones for 2012 soon!
Lawn Ghosts are a fun outdoor decoration to make
which will 
have your neighbors
talking for weeks!

They are super easy peasy to make...


Just get yourself some:
Cheap Plastic Drop Cloths

White paper, newspaper
or even leaves to stuff the heads


6 or 8 Lengths of rebar- 3 to 4 feet high

Clear packing tape

a bunch of older outdoor white
Christmas Lights with a long extension cord


HOW TO ASSEMBLE
 1.  Hammer your rebar into the ground 
in a circle formation or a wavy "tango line"

2. Cut lengths of drop cloth double the height you want your ghosts

3.  Form the head by balling up paper.  When you have a large enough ball place in center of stretched out drop cloth section.

4.  Gather the  drop cloth and cover the paper forming a head, almost as if you were covering a lollypop

5.  Place "head" of rebar and wrap packing tape around plastic to form neck.

6.  Randomly cut up from the bottom of the plastic to form ribbons

7.  Gather at the waist area and tape again
Your ghosts should now look like armless
lollypop dolls at this point.

8.  Cut several long strips of dropcloth to form arms.
These are crisscrossed and tied arround chest area, then each "hand end" is knotted to the next ghost's "hand end" to look like they are holding hands.

9.  Place your heap of lights on the center and plug in!

You can keep these up thru Christmas-
Just add wings and string the lights around them
and they
become
Angels!!!
Just don't forget the aluminum foil halos:) 


And just to keep in with the Pink Saturday theme, wouldn't you just adore these pink wellies to flitter around your garden in?!

I am linking this post to Miss Beverly's PINK SATURDAY- the theme this week is Pumpkins so hop on over and see if there are any ideas that catch your fancy!!


The New Pin-Inspiration Contest!!!

YOUR "PIN-spiration" COULD WIN A SURPRISE BOX OF GOODIES FROM THE PINK PIXIE FOREST!

Hello My Sparkly Friends!  Of course we all LOVE Pinterest darlings- so let's share the projects we have done that were inspired by Pinterest and win a sparkly surprise box!!  The "Surprise Goodie Box" will be filled with a variety of crafty de-stash stuff and a sparkly surprise.
Winner will be chosen every two weeks till December 1st!


Why not  create your own Pinterest board of all the projects you have completed.
RULES:Create a post about a project you have created that was inspired by a Pinterest Pic. 
Let's keep the projects limited to crafting, garden, decorating, Holidays and Tablescapes.
Your post should include the Pinterest Inspiration photo/link, and pics of your project-
either just "after photos" or step by step.
Be sure to LINK ONLY THE POST URL, NOT YOUR HOME PAGE or your entry may be deleted!!!
CMON and Strut Your Sparkle!!!

The Pink Pixie Forest Has Come To Life!!


Hello My Sparkly Friends!!!
Sorry it has been a while since I have posted- The pixies and I have been busy bringing the Pink Pixie Forest to life in my backyard.  We removed a few trees to make way for Mr. Sunshine, knocked down an old dilapidated shed, trimmed the big ugly black chain link dog run in half and changed it to silver.
Then we added lots of pretty crushed gravel and bluestone, hydrangea, hibiscus and rose bushes  and plenty of pennsylvania wall stone for some sweet rock walls.  It is now the home of two Fairy Cottages and garden art space for my classes, a raised garden for next year's vegetables, and a few little outdoor "sitting rooms" which I am still working on.  It is like a little pinterest dream come true!
Here are some fun before and afters!

Before- Concrete pad for fairy cottage
After- Cottage, Arbor and Bluestone 
sitting area and path


Before- Yucky Dog run
After- Raised beds- view from deck

Before
after

before


I just love having these raised beds now instead of a big black chain link poopy dog run!!


after


Before raised beds
After raised Beds and gravel


Before stone wall


Stone wall constructed


Stone wall planted

                                    Cottages installed


Have a wonderfully sparkly weekend, and a happy Pink Saturday!
 Sparkly Hugs,
Tobi and the Pixies!